Minecraft in the Cloud — for Free! — Nice and Simple
Minecraft is well known for being the best selling video game of all time, voxels and confusing the heck out of people who want to play with their friends! However I’m here to show you an amazing and unique way to connect you and your friends together;
In this addition to the Nice and Simple series I will show you how to make your very own Cloud based Minecraft server, for free!
Some reasons you may want your Minecraft server in the cloud in comparison to hosting a server on your local machine or Minecraft Realms may include:
- It costs you nothing, forever!
- It will keep running even after you turn your computer off, it will run 24/7 and you and your friends will be able to join whenever you want.
- You won’t need to make a Virtual Private Network (VPN) to connect you and your friends together.
- You can modify this server with Mods and Plug-ins to your heart’s desire. Note: I will create a vanilla server in this article, however if people want, I can create a tutorial for modded servers!
Back-story: I’m creating this server for my housmate’s grandchild. They’re only young and therefore can’t set up their own server, instead they are expected to pay money to play with their friends! Shame on you Minecraft.
Prerequisites
In this article you’ll learn to make your server using the Oracle Cloud Infrastructure, so you should sign up with them now! There’s no promo code, affiliate link or free trial whatsoever!
Additionally you’ll need:
- A Computer with an internet connection (Any OS)
- Time and Patience, especially if you’re new to Linux
The operating system in this article is the one I run: Fedora (Linux). However, if you have Windows, Mac OS or even Android the steps are exactly the same.
Step 1 — Setting up your Free Cloud Server
After creating your account and signing in you should see a screen like this:
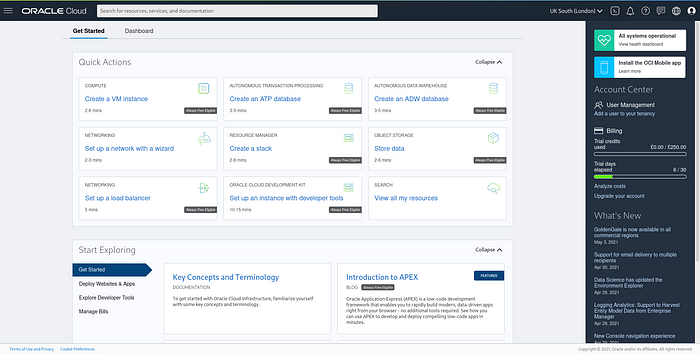
This is the OCI (Oracle Cloud Interface) Dashboard. There are many features here most of which we don’t have to concern ourselves with. Additionally, I won’t be using anything that requires the 30 day free trial in this article, meaning your server can run forever without any costs!
From here you’ll want to press “Create a VM instance” and fill out the details so it looks like mine:

Here, you can keep most of the settings default. I recommend changing the name of the Instance and giving your networks some names. Press“edit” to do this.
Choose whatever flavour of Linux you want, however I recommend “Oracle Autonomous Linux” as it’s the easiest to set up and keep running.
Now this next step is very important! When you scroll down you’ll see that you have to make or upload an “SSH key pair”. Think of SSH keys like real keys. They’ll be used to access your Server so keep your keys safe!

You should generate an SSH key pair here and download both of the files, save them somewhere you’ll remember on your device. I made a folder for these in my Documents folder.
Now click “create” and create your very own free server!
It may be “Provisioning” for a couple of minutes, however once this finishes it’ll be fully online.

To use your new server, you’ll first need to access it via a technology named “Secure Shell” also known as SSH. Remember the SSH key?
I’ll explain how to do this in the next section. ->
Part 2 — SSH and Server Files
Now that your cloud instance is running, you’ll want to access it to download your server files. As stated previously you can access your cloud instance via a Secure Shell.
Linux and Mac users are able to use their terminal for this.
However Windows users will have to download a software like PuTTY.
Putty can’t use normal SSH keys, it needs to use its own special .ppk file format, thankfully the installer for putty includes a software that can translate your SSH keys into .ppk keys. A tutorial explaining how to do this and more is outlined below:
So, to connect to your server you’ll need your Private Key that you generated and saved earlier, your server’s Public IP Address and a User Name. The IP Address and User Name can be found under “Instant Access” on your server’s dashboard:

Now that you’ve got all the details you need, open a terminal or your software of choice and type in a command similar to this:
ssh opc@132.145.50.239 -i ~/Documents/GameServer/ssh-key-2021-05-08.key#Replace the IP address, user name and path to key with your own
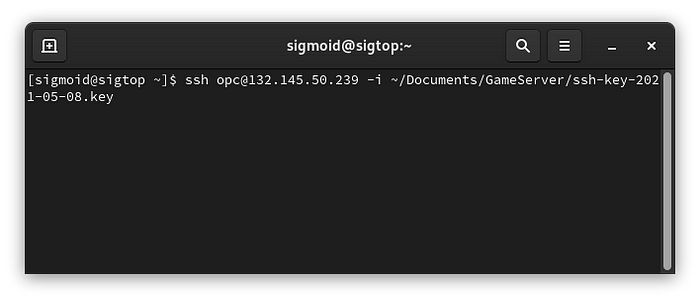
Once you’ve written your command just press enter and it should look like this:
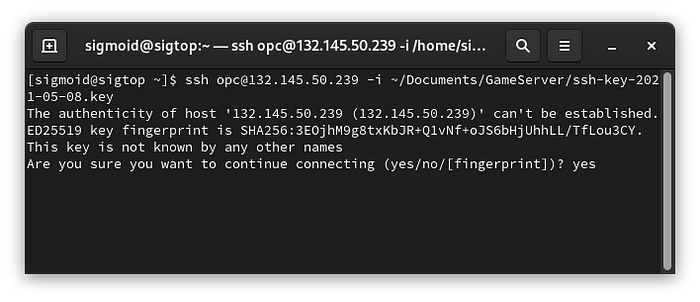
If it warns you about “Authenticity” don’t worry, you know this server is yours so it’s safe. Just type in “Yes” to this prompt. If your terminal looks like mine, you’re literally in your server right now!
You’re ready to download your Minecraft Server files now.
I’m going to download the official Minecraft Java edition server files from their website, to download them I’m going to use a Linux command “wget” which downloads things from the internet. Write a command that looks like mine:
sudo wget https://launcher.mojang.com/v1/objects/1b557e7b033b583cd9f66746b7a9ab1ec1673ced/server.jar
Now type in the command “ls” (Long Listing) to see if your server file is there:

If your terminal looks like mine well done! We’re now ready to go onto the next step where we’ll set up and run the server ->
Part 3 — Java and EULA
As you may know, Minecraft Java edition runs on… Java! As do Minecraft Java edition servers so let’s download Java so we can get our server running.
I’ll run each of the following commands one by one from top to bottom to install Java on our Cloud Instance:
sudo yum-config-manager --enable rhel-7-server-optional-rpmssudo yum install java-11-openjdk-devel -y
When you’ve finished that, typing in java -version should result in a screen that looks like this:

Now that we’ve got Java, let’s run our Minecraft server. To do this we’re going to type in a command that tells Java how to run that “server.jar” file we downloaded earlier:
java -Xmx1024M -Xms1024M -jar server.jar nogui
If your server fails to load like mine did, that’s ok! It’s supposed to do that, the Minecraft server wants us to accept an EULA (end user license agreement). It has conveniently created an “eula.txt” file for us to edit and therefore tell the server we agree.
I’m going to use a lightweight, built-in text editor called Nano to modify the eula.txt file. First open the file in Nano using:
nano eula.txt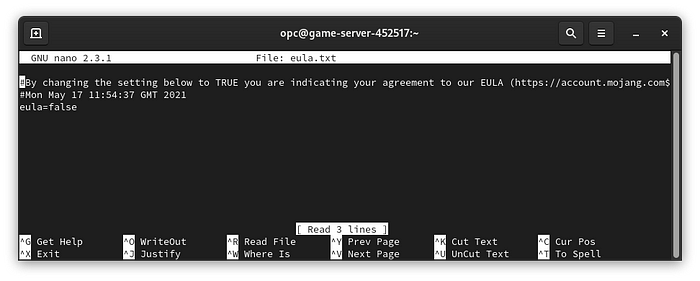
As you can see, the contents of the ‘eula.txt’ file are in the middle, and the top and the bottom are Nano’s rudimentary user interface.
You can use your arrow keys to change the placement of your curser, then much like a normal text editor, you can use backspace to delete the word “false” and replace it with “TRUE” exactly how the instruction in the ‘eula.txt’ document say:

Now to save this change, we’ll press ctrl+x followed by y then press enter on your keyboard. ctrl+x -> y -> enter
Note: Don’t run the server yet! I’m going to teach you how to run it in a socket later so you don’t end up loosing it!
Great! Now that we’ve accepted the EULA we can move onto the next step where we’ll prepare the Cloud Server’s network ->
Part 4 — Firewall and Port Forwarding
Before you and your friends can join, we need to tell your Cloud Server’s Network that it’s ok for your friends to connect to the server (Firewall) and where those connections should be directed (Port Forwarding).
First let’s do the port forwarding, go back to Oracle’s cloud website and open your Compute Instance’s dashboard, there you will see a heading called “Primary VNIC”:

Click the subnet’s Hyperlink to go into the subnet’s dashboard.
Then look under the heading “Security Lists” and press the one currently existing security list there.

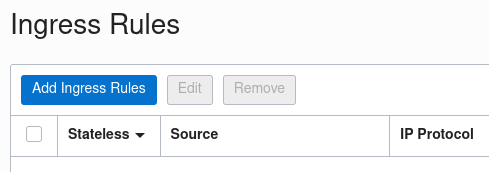
After that look under the header “Ingress Rules” and click “Add Ingress Rules”.
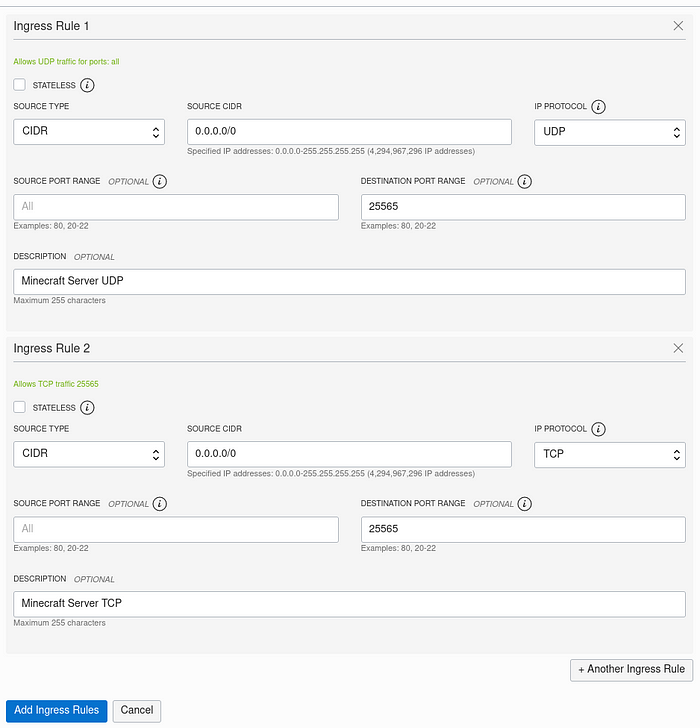
We’re going to Port forward the port 25565 as that’s the default port the Minecraft server uses. We’ll let this same port through the firewall later. Add two ingress rules like the following:
Now that we’ve done that, let’s let you and your friends through the firewall. First I’m going to open up a new SSH connection because currently, our other connection is talking to the Minecraft server, not the Cloud server:
ssh opc@140.238.89.163 -i ~/Documents/GameServer/ssh-key-2021–05–08.keyOnce you’re in, type in the following commands to open up the firewall to the port 25565:
sudo firewall-cmd --permanent --zone=public --add-port=25565/tcpsudo firewall-cmd --permanent --zone=public --add-port=25565/udpsudo firewall-cmd --reload
That’s all on the network side! In the next section I’m going to teach you how to change the server settings and use Screens so you don’t lose your Minecraft server ->
Part 5 — Server Settings and Screens
First let’s change some of those server settings for a smoother experience!
Using Nano again, let’s modify the server.properties file, if you can’t remember how to use Nano, refer back to part 3 of the article.
nano server.properties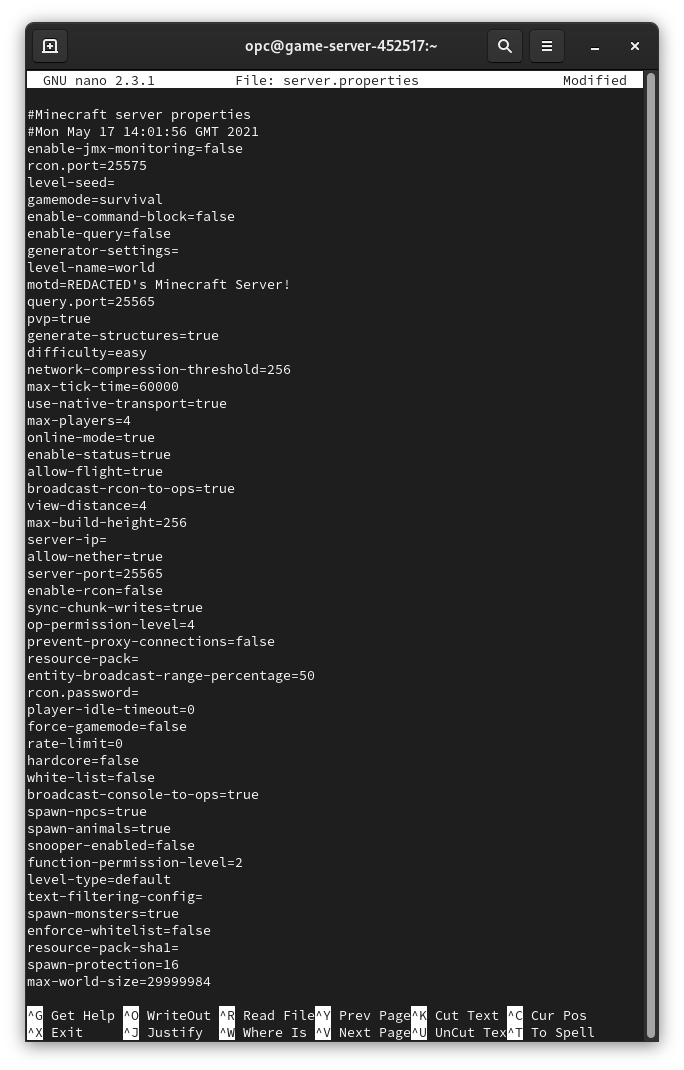
The properties I recommend changing are:
max-players = LOWER (choose a number that's lower)
view-distance = LOWER
entity-broadcast-range-percent = LOWER
snooper-enabled=false
I recommend you change these values to be lower because our free cloud server isn’t the strongest out there and may struggle with higher settings.
Now let’s install a tool called “Screen” so we don’t end up loosing our Minecraft server after is starts running!
sudo yum install screen -yAwesome! Now I’ll give you a quick tutorial on how to use a screen;
- You will always launch you Minecraft server in a “Socket” (using screen)
- You can view what sockets are currently running
- You can go back into a socket even after you’ve disconnected your SSH session.
To launch your Minecraft server in a Socket use:
screen -dmS myserver java -Xmx1024M -Xms1024M -jar server.jar noguiNote: -dmS myserver gives the socket the name “myserver” you can switch this out with whatever you want.
To view what sockets are currently running use:
screen -ls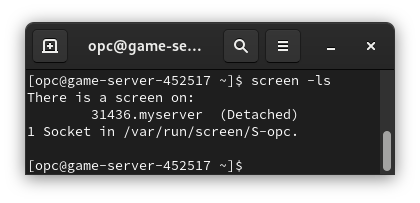
Note: You can also see the name of the socket here. “Detatched” just means you’re not currently viewing the socket.
To view a specific socket, use:
screen -r myserverOnce you’ve done that you’ll see all the outputs of you running Minecraft server! You’ll also be able to type commands directly into your server here.
To “detach” from a socket, press ctrl+A -> ctrl+D . You’ll be placed back in your Cloud Server’s terminal.
Wow! That was a lot! If you’ve made it this far, give yourself a pat on the back, you’ve earned it!
In the next part, I’ll show you how to let your friends join and give you some useful links explaining how to use Minecraft servers ->
Part 6 — Friends and Things to Know
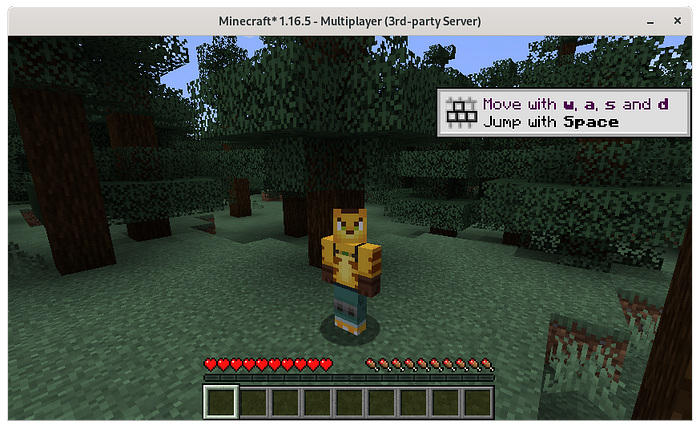
When your server’s running, all you need to do is use your Cloud Server’s Public IPv4 Address to join. This is the same IP you used to connect to your cloud server through SSH. Hand this IP out to your friends and you’ll all be connected!
If you get an error message like so:

It means that your cloud instance is running, however the mine-craft server isn’t running. To fix this, SSH back into your cloud server, and use the screen command to launch your Minecraft server again.
Here are some resources teaching you how to use a Minecraft server:
I hope this guide helps someone out there! And I’ll always be improving this guide so tell me if something is wrong! 👍
Bonus tip
You can give you server a free domain name via websites like:
This means that, instead of typing in your whole IP address, you can type in a user friendly code like ben.server.com
